So here is the photo etch engine vents.

So first up was cutting out the vents...

Then the vents were placed between the jig that was also included with the photo etch. You can see in the photo the 45 degree angled teeth.

This allowed for me to lightly push down the vanes of the etch into a 45 degree angle so you can see inside the engine vents.

After which, the vertical pieces needed to be removed from the etch sheet...

And glued in place on the vents.

After this was the removal of the out ring...

Which was then glued to the vents.

Then primed and painted the matching body color.

Then center of the plastic engine vents then needed to be removed. I did this by cutting out the center of the vents with a dremel saw....

then carefully grinding out to the edge with a dremel...

then doing fine removal of excess plastic with an exacto blade.

The photo etch vents were then glued in place on the underside of the plastic vents.

I then airbrush the photo etched vents black


I also got these 3D printed engine fans...

which were primed...

then the outer inside ring painted black...

the detailing in the center painted with a black wash...

silver paint added to the edges of the blades as well as some dry brushing of silver along the top to simulated scrapes and scratches...

and some rust and soot weathering. Because these are going to be underneath the photo etch vents, very little detail will be seen if any at all.

The fans are then glued in place under the photo etch.

And they turned out quite nice. You can see through the vents and see the fans underneath. Again, very little detailing can actually be seen, but the silver on the edges of the fan blades does pick up some light and you can see that there's a fan under there.

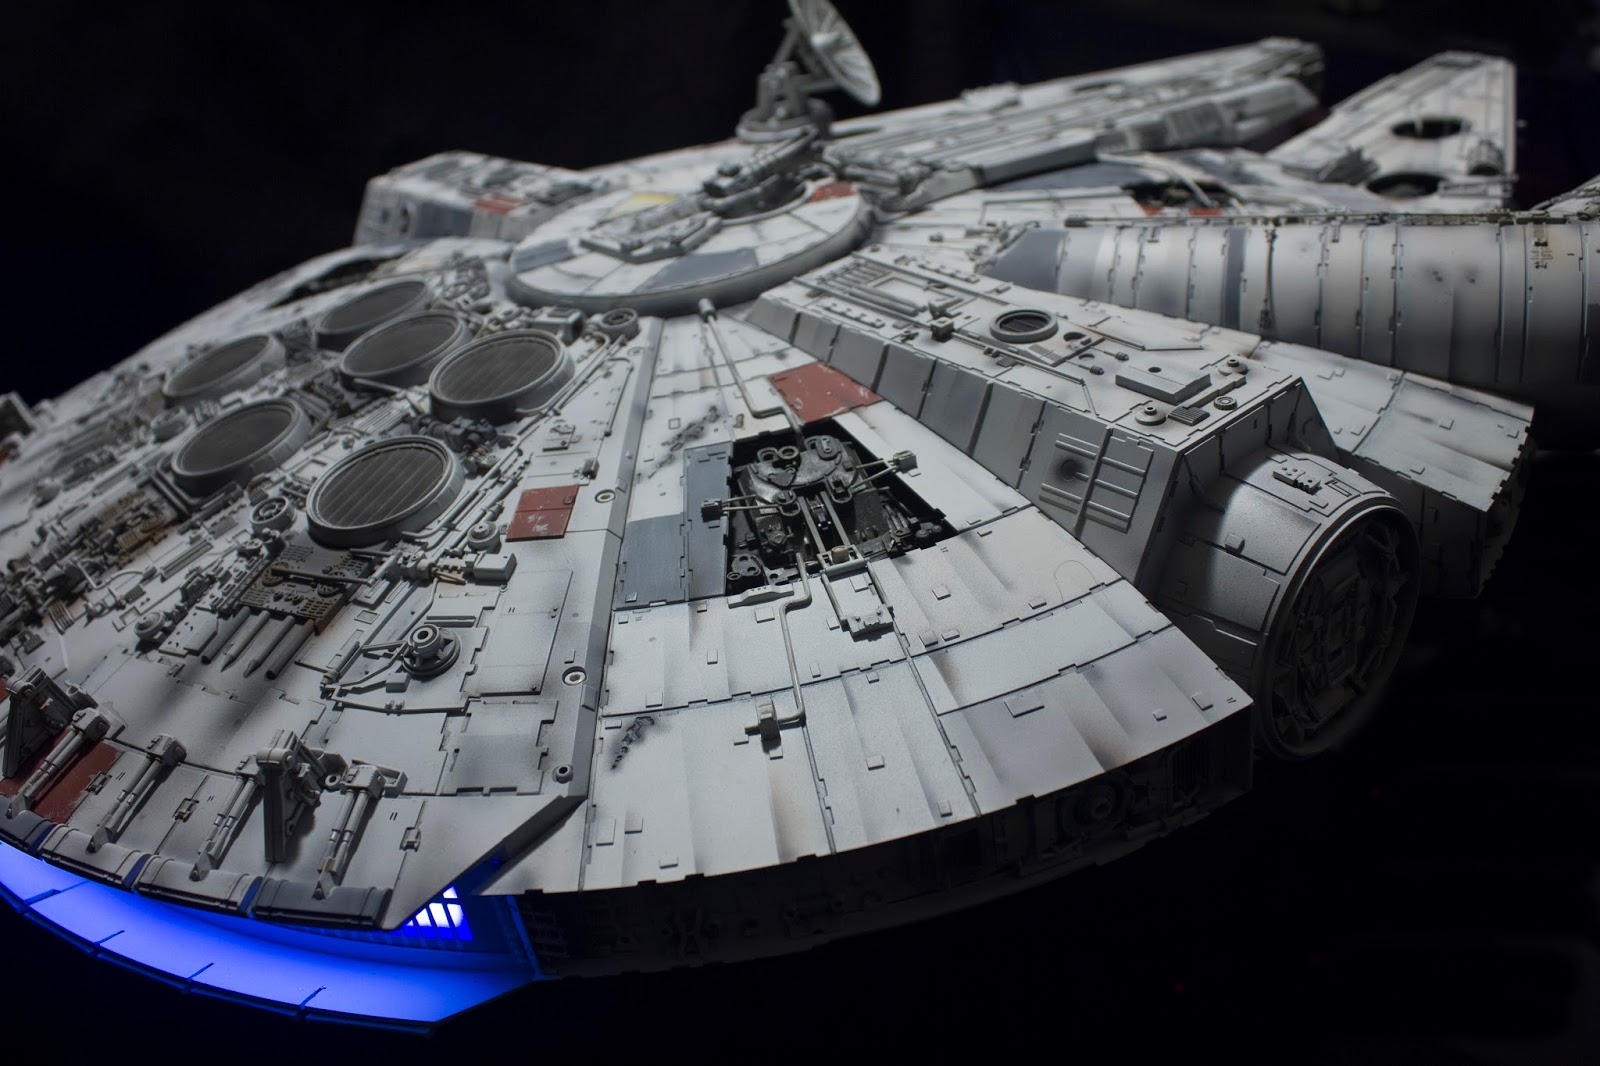
At this point, it was then finally securing the vents to the rear of the Falcon.
You can see in the following photos that they turned out quite nice. You can definitely tell there are fans under there and it just adds more depth and realism to the vents.


I also finally got my custom glass case I had made for my display table. This really set it all off and gives it that museum quality look.

And a shot of the table without lights on. You can see how the glass picks up the red from the table lighting and reflects it along the edges of the case. I'm very happy with the way this all turned out.

So thanks for joining me on the amazing journey of the building the Falcon. Keep watch on my blog for further model build from the Star Wars universe. I'm about done with my AT-ST, and then I'll begin on my Y-Wing fighter.